[AUTO](VC) Limit Break 4 (This ability is active if you have four or more damage):[Choose three of your rear-guards with "Revenger" in its card name, and retire them] At the beginning of the close step of a battle when this unit attacked, you may pay the cost If you do, choose up to 1 card named "Revenger, Raging Form Dragon" from your hand and ride it as [Stand], choose one of your Vanguards, and it gets [Power]+10000 until the end of turn.
[AUTO](VC):[Counter Blast(1)] When this unit attacks, you may pay the cost, if you do, this unit gains [Power]+3000 until end of that battle.
[CONT](VC/RC): Lord (If you have a unit without a same clan as this unit, this unit cannot attack)
Gotta get my feet wet if I'm going to take this new route.
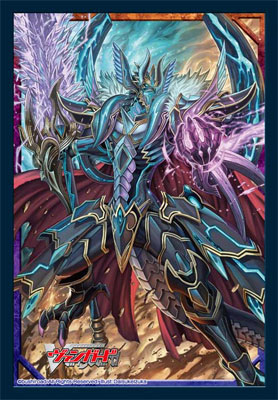
One of the newest announced Shadow Paladin bosses, Raging Form Dragon is
Wait, Raging 'Form'? I thought it was Folm, like the palm of your hand. The unit's hand is even glowing from the palm! Anywho
Raging Form Dragon continues the trend to trade Shaladin Rear-Guards for explosive power rushes and generating a lot of auxiliary advantage. Instead of Phantom Blaster Dragon's power up and crit, or Ildona's late game trading of field advantage for hand advantage, Folm instead grants a second Vanguard attack, setting up to force more cards out of the opponent, drag out more damage, and double your trigger forces. But how exactly does this card stack up?
Let's find some B.a.s.s. Values. Assuming the usual 12 Crit 4 Heal both players at 5 etc. that I always take with a B.a.s.s. value, a field of:
.jpg)

will have a B.a.s.s. value of 1875/49K shield, 228/49 cards when you're not using any skills. On the other hand, with a R-V-R attack pattern, retiring the rested column and the Vanguard booster, using the Limit Break will increase the B.a.s.s. Value to 3015/49K shield, 6.9026789254092016 cards. Long story short, when you also consider its cost of 4 retires and discards, and immediately regaining 2 cards from the new Twin Drive, you drive a net gain of...+0.25.
Okay, so it's not the most amazing advantage engine. You also have to remember that you also just killed off 3 probably battle ready Rear-Guards. Sure, you can maybe transfer some 10K shield to your hand through the 2 new Twin Drives, but above all else, if you are going to use Raging Form Dragon, you really need to make sure that its skill packs a punch, one to drive your opponent's resources to the ground and really grasp victory, because due to how its skill works, you just can't afford to use it otherwise. But even as a finisher, it has one little glitch it has to hurdle over, its pseudo Persona-Blast. Unlike say, the End or Maiden of Trailing Rose, both of which can actively keep its second copy in play without sacrificing performance, Raging Form doesn't have this luck with this luxury.
Like Perfect Guards, you will see copies of this card in 12 card cycles. This isn't a necessarily bad thing at first, as if you're in the late game, you're most likely well into your second cycle, or even reaching your 3rd. The issue though, is if you draw into your second copy early on in the cycle. If you do, you're forced to hold onto that second copy until just the right opportunity, or risk burning out a lot of your resources for very little net advantage much at all. This basically takes away the luxury of another attacker from your hand until well into the late game, or some optimal Perfect Guard fodder since you're going to have to be forced against a wall to activate the skill anyway. While this may not be an especially devastating problem in retrospect, the fact remains that you will be short one card. Since the second cycle starts at the beginning of the midgame, you can and most likely will have to deal with holding onto a virtually dead card while your opponent isn't restricted at all by this, and however menial it may or may not be, it will make a difference.
But that's not to understate Raging Form, of course. Despite that slight gimmick in its activation window and cost, you're still looking at a really threatening standalone finisher. Once again, Raging Form sums up to a ridiculous B.a.s.s. value of 3015/49K shield, 6.9026789254092016 cards. Instead of just barely getting by with only 5 cards with at least 40K shield, you cannot realistically expect to survive a full assault without at least 60K shield and 7 cards. Perfect Guards can barely even fight back, because despite blocking out a 20K shield eating attack if it were used on the second Vanguard attack, none of Raging Form Dragon's final attacks should realistically require 3 cards to guard, sans pulling at least 3 triggers or such. Because of this, underestimating Raging Form's Limit Break can very well be the end of you.
Raging Form also comes with a cute little CB1 - +3K skill that's really incredibly unnecessary. Force out 5K more shield with a 7K booster, and that's basically it.
How to Use This Card
As a finisher, you always want to follow the general rule of watching the opponent's hand. If you somehow push the opponent to 5 damage, it's rather obvious where your killzone is, whenever their hand drops below 7 cards or you know they lack 65K shield/45K shield and a Perfect Guard.
Assuming that both of you are at 4 and they always take the first hit (since you can't really risk taking a Vanguard attack, and you don't know yet if the final column will have an extra crit), the B.a.s.s. value shifts to about .95 damage, 48010.808015932307 shield, 5.3487048258107071 cards. While tracking the opponent's hand, if they have less than 45K shield (or 30K +1 Perfect Guard) and 5 cards in their hand, then you can fire away and finish them off.
Like any finisher, you have to remember that your deck and skills pay off best if you can hold at least some leverage over the opponent to get them to the late game. After all, what good's a finisher when you can't even get your opponent into the killzone? Because of how his cost works, I presume a deck that it's used in is almost entirely made up of Revengers, so some key cards are going to be Claudas, Tarutu, Blaster Dark, and Araun as far as leverage goes. With Blaster Dark's support and Tarutu establishing field presence, and Blaster Dark and Araun enforcing the power distribution, gaining control of the midgame and establishing an edge to quickly set up the opponent for Raging Form's finishing attack can be a simple task.
It should be noted that for a deck based on this card, forward advantage is key. If you absolutely must take down a power line or else it'd compromise your resources, then you shouldn't stop yourself from doing so. However, all priority must be placed on pushing your opponent into the danger zone, whether it be somewhere uner 45K shield and 5 cards if they're at 4 damage or below 65K and 7 cards if they're at 5 to truly aim for victory. Because of this, Tarutu and Araun should take high priority in your plays, with Claudas following behind (hopefully while chaining into Dorin), and Blaster Dark being the last to touch your Counter-Blasts. After all, despite all of that power resting in Raging Form, the rather simple nature of the rest of the deck means it's all but hazardous to prolong the game for too long.
Like Perfect Guards, you will see copies of this card in 12 card cycles. This isn't a necessarily bad thing at first, as if you're in the late game, you're most likely well into your second cycle, or even reaching your 3rd. The issue though, is if you draw into your second copy early on in the cycle. If you do, you're forced to hold onto that second copy until just the right opportunity, or risk burning out a lot of your resources for very little net advantage much at all. This basically takes away the luxury of another attacker from your hand until well into the late game, or some optimal Perfect Guard fodder since you're going to have to be forced against a wall to activate the skill anyway. While this may not be an especially devastating problem in retrospect, the fact remains that you will be short one card. Since the second cycle starts at the beginning of the midgame, you can and most likely will have to deal with holding onto a virtually dead card while your opponent isn't restricted at all by this, and however menial it may or may not be, it will make a difference.
But that's not to understate Raging Form, of course. Despite that slight gimmick in its activation window and cost, you're still looking at a really threatening standalone finisher. Once again, Raging Form sums up to a ridiculous B.a.s.s. value of 3015/49K shield, 6.9026789254092016 cards. Instead of just barely getting by with only 5 cards with at least 40K shield, you cannot realistically expect to survive a full assault without at least 60K shield and 7 cards. Perfect Guards can barely even fight back, because despite blocking out a 20K shield eating attack if it were used on the second Vanguard attack, none of Raging Form Dragon's final attacks should realistically require 3 cards to guard, sans pulling at least 3 triggers or such. Because of this, underestimating Raging Form's Limit Break can very well be the end of you.
Raging Form also comes with a cute little CB1 - +3K skill that's really incredibly unnecessary. Force out 5K more shield with a 7K booster, and that's basically it.
How to Use This Card
As a finisher, you always want to follow the general rule of watching the opponent's hand. If you somehow push the opponent to 5 damage, it's rather obvious where your killzone is, whenever their hand drops below 7 cards or you know they lack 65K shield/45K shield and a Perfect Guard.Assuming that both of you are at 4 and they always take the first hit (since you can't really risk taking a Vanguard attack, and you don't know yet if the final column will have an extra crit), the B.a.s.s. value shifts to about .95 damage, 48010.808015932307 shield, 5.3487048258107071 cards. While tracking the opponent's hand, if they have less than 45K shield (or 30K +1 Perfect Guard) and 5 cards in their hand, then you can fire away and finish them off.
Like any finisher, you have to remember that your deck and skills pay off best if you can hold at least some leverage over the opponent to get them to the late game. After all, what good's a finisher when you can't even get your opponent into the killzone? Because of how his cost works, I presume a deck that it's used in is almost entirely made up of Revengers, so some key cards are going to be Claudas, Tarutu, Blaster Dark, and Araun as far as leverage goes. With Blaster Dark's support and Tarutu establishing field presence, and Blaster Dark and Araun enforcing the power distribution, gaining control of the midgame and establishing an edge to quickly set up the opponent for Raging Form's finishing attack can be a simple task.
It should be noted that for a deck based on this card, forward advantage is key. If you absolutely must take down a power line or else it'd compromise your resources, then you shouldn't stop yourself from doing so. However, all priority must be placed on pushing your opponent into the danger zone, whether it be somewhere uner 45K shield and 5 cards if they're at 4 damage or below 65K and 7 cards if they're at 5 to truly aim for victory. Because of this, Tarutu and Araun should take high priority in your plays, with Claudas following behind (hopefully while chaining into Dorin), and Blaster Dark being the last to touch your Counter-Blasts. After all, despite all of that power resting in Raging Form, the rather simple nature of the rest of the deck means it's all but hazardous to prolong the game for too long.
How to Fight Against This Card
Because of how reliant Raging Form is on the rest of the deck to help carry it into the late game, it should be no surprise that any direct counter is to shut down or completely outpace it.
If Araun, or for some reason, Claudas are in the frontrow, they should be immediate targets to kill off. Araun for obvious reasons, and Claudas to shut down the opponent from trading it into a Blaster Dark Revenger, which can help set up their field. Along with attacking those priority Rear-Guards, if you feel you're going to have trouble pushing your opponent back as hard, you should throw any smaller, weaker attacks at their Rear-Guards. Rather than sending, say, an unboosted Rear-Guard Dragonic Kaiser Vermillion at Raging Form to just try to scrape out maybe one more damage, if the opponent would need one more CB to start activating Tarutu or another damage to send out an early strike with Raging Form to try to deter your hand, you should instead sent it off to attack a Rear-Guard, possibly hindering your opponent's forward push and at least guaranteeing that you'll be dragging down something out of the opponent, which may play against their leverage.
If you're not too totally reliant on Rear-Guard strength, like a Raging Form deck where Araun is an auxiliary force who can help drive the deck but isn't necessarily an all important card to the strategy, feel free to make use of them. 15K columns should rarely guarded right away in the midgame if no skills are involved, meaning nearly ensured damage when you use those power columns on the opponent. Ignoring that an extremely early use of Claudas might lead to slight issues in drawing copies of Blaster Dark Revenger, setting up these Power Lines to bait out Blaster Dark's skill where the Counter-Blasts would be far better spent on Tarutu if the field needs developing or Araun to counteractively fight back just as hard can easily mess with the opponent, demanding and possibly starving them of necessary Counter-Blasts
In any case, all small things eventually do add up. While it's easy for the opponent to just ask you how many cards you have left in your hand, the contents of it can stay relatively concealed from them. Remember that the danger zone is to have less than 45K shield in the form of 5 cards, or 30K and a Perfect Guard in the form of 5 cards if you were at 4. If you have 6 cards but only 30K shield and no Perfect Guards in hand you're well into the danger zone since you have less than 45K shield. However you can throw off the opponent's Limit Break and deter them from pushing for game if they don't know that your hand is so limited. Keep a mental note of which cards you drew into regularly, and which cards you drive checked — the ones that your opponent should be aware of. More than anything, use those Drive Checked cards for anything you must do. If you Drive Check triggers, always use those first in your attempts to guard. Pull any beaters, and immediately call them out to the frontlines (hopefully coupled with some smart intercepting). Even if your hand was made of nothing but 6 5K shields, if the opponent only knows about 2 of those 5K shields, you can almost ensure to yourself that they wouldn't be ballsy enough to set off the Limit Break yet, and despite your hand being well in danger zone, you can still hope to survive the turn just fine to launch your own assault.
----------------------------------------------------------------------------------------------------------
Well this was a nice change of pace. The new Card Review articles will focus on some more specific points about a certain card, characteristics that should be noted specifically for it like math and numbers that have to do with its skill. Along with this, here is where counter-plays against the card/deck/aspect of the card will be placed.
Nice Article Keep em coming!
ReplyDeleteYou should do more card reviews for the Main Vanguards of the new sets like Lib. Alfred, though I think you already did something similar to that, but things like Lib. Garmore, Nebula Lord, Revonn, etc It would be a cool series to review the Clan's main aces. :D
ReplyDeleteGreat article dood! I'm certain many would love to see more of such articles.
ReplyDeleteraging is pretty cool i didnt want to get him because he was pricey and i need more than one copy of him if i want to put him to any use but i just got a copy of him in a random booster pack off amazon so i think i can spend the extra money in my wallet for at least just one more
ReplyDelete