So I'm updating the first major article I've ever done on this blog, Dragonic Kaiser Vermillion Narukami, and I felt like taking notes to both help me along with making this article, give myself something in the future to look back on, and maybe share my creative experience with others.
Before I begin building the deck with zero frame of reference to build on, I look through the list of cards Narukami has access to and filter out those that I can't use in the deck. In this specific example, I remove all archetype cards like Eradicators, Brawlers, and the Dungaree specific support. Along with this, due to the rules I put on myself, I filter out any cards that are too many sets ahead. At this point, it's important to not allow any bias into the card selection. Remove cards from the list according to whether or not the deck can use them, not because they don't appear to be able to be used well. In my most recent article, Great Daiyusha vs Reverse Daiyusha, this was integral to helping me notice how much more flexible Great Daiyusha was at allowing for a strong mid game.
This step is extremely important for the next step: Testing. Because I've already filtered out a (large) number of cards I know the deck can't use, it saves me time of trying to have to work around them later on as I experiment with different deck builds. Have you ever heard that saying to 'learn from your mistakes' and such? Forget that. It's a good statement on its own but it misses the point. It's not that you should bluntly focus on your failures and work from that, but you should understand how and why things happened the way they did. This also extends past failures and into success. If you failed, take notes about every reason why you think the deck failed during testing, be it a lack of pressure, failing to build card advantage, or inconsistencies caught up with it. If you succeeded, try to list out why you won. From fighting another deck that it does well against, the amount of card advantage maintained through the fight, or even if small quirks like Early Guarding ended up making all the difference. By the end of the day, your notes should amount to quite a lot, and after cross referencing successes to failures to the deck builds themselves, should lead to a final build or at least a rough draft of one.
Due to the way I structure my deck articles, with me leading off with card choices and how they influence the deck individually, then leading into how the deck should function as a whole, these notes are especially helpful for giving me actual substance to fall back on and write about. With the Narukami article, where my deck's emphasis is on Dragonic Kaiser, Vermillion's Limit Break, you'll find I have a large amount of notes based around Counter Blast efficiency, what cards can function best for the deck without CB and how much CB that Garuda allows for others. This influences the article as I write a lot around how much resource management works in the deck as I set up for Vermillion. Most of these notes around CB efficiency will be falling under the card choices section, due to how a large majority of how CB efficiency works is very specific to each individual card. Along with this, now that I've gotten all the notes about CB efficiency itself out of the way, this allows me more freedom to explain the effects of that CB efficiency as I write on about how the deck as a whole functions, due to the fact I've clarified how resources flow in the deck already. In other words, it makes writing the article far easier for me in the long run if I spend my time early on working through the more technical facts so that I don't need to continue reexplaining them later on.
Hope this gives some good incite into how I work. The revised Vermillion article will be on its way shortly.
Thursday, March 27, 2014

Wednesday, March 26, 2014
Deck Breakdown:Great Daiyusha vs. Яeverse Daiyusha
This took way too long to write
Grade 0
Dimensional Robo, Daimagnum
X4 Demonic Eye Monster, Gorgon
X4 Dimensional Robo, Daibattles
X4 Dimensional Robo, Gorescue
X4 Justice Cobalt
Grade 1
X2 Commander Laurel
X4 Dimensional Robo, Dailander
X4 Dimensional Robo, Daishield
X4 Karenroid, Daisy
Grade 2
X4 Dimensional Robo, Daidragon
X4 Dimensional Robo, Daidriller
X3 Dimensional Robo, Daifighter
Grade 3
X4 Super Dimensional Robo, Daiyusha
X2 Super Dimensional Robo, Daikaiser
X2 Ultimate Dimensional Robo, Great Daiyusha
Grade 0
Dimensional Robo, Daimagnum
X4 Demonic Eye Monster, Gorgon
X4 Dimensional Robo, Daibattles
X4 Dimensional Robo, Gorescue
X4 Justice Cobalt
Grade 1
X2 Commander Laurel
X4 Dimensional Robo, Dailander
X4 Dimensional Robo, Daishield
X4 Karenroid, Daisy
Grade 2
X4 Dimensional Robo, Daidragon
X4 Dimensional Robo, Daidriller
X3 Dimensional Robo, Daifighter
Grade 3
X4 Super Dimensional Robo, Daiyusha
X2 Super Dimensional Robo, Daikaiser
X2 Ultimate Dimensional Robo, Great Daiyusha

Daimagnum's place in this deck is nearly invaluable. It provides a definite initiation into early game Daiyusha gambits, immediately setting up the deck for its winning image and dominating the opponent by turn 3. Due to how power ups and field stages work, its presence in the deck also allows for more flexible field arrangements as it can donate its power and presence to the Vanguard while also removing itself from the field, allowing you an option to help rearrange your setup, or better capitalize on your hand.
.jpg) After Daimagnum, Dailander and Daidriller take over to constantly pump up SDR Daiyusha. Assuming you already will ride SDR Daiyusha, and since turn 3 will usually be taken by Daimagnum, there will be a nearly 95.2% chance of getting at least one or the other of these boosters, and an 88.2% chance to get yet another turn 5, which alongside Daimagnum virtually guarantees a strong transition through the mid game as the deck consistently sets up against the opponent.
After Daimagnum, Dailander and Daidriller take over to constantly pump up SDR Daiyusha. Assuming you already will ride SDR Daiyusha, and since turn 3 will usually be taken by Daimagnum, there will be a nearly 95.2% chance of getting at least one or the other of these boosters, and an 88.2% chance to get yet another turn 5, which alongside Daimagnum virtually guarantees a strong transition through the mid game as the deck consistently sets up against the opponent.These cards also have some application for the late game. With a +4K boost, it would only take a 17K column to hit a stage 3 attack on 11K Vanguards, Daidragons and the 4 11K Grade 3s, along with Karenroid Daisy, is nigh impossible to not achieve, especially if 10K Vanguards come into the picture. Couple this with how cheap their abilities are through the midgame (assuming you use them up to turn 5, which will be where the late game begins), you would only have burned through 2 Counter Blasts. Once again noting how easy it is to create proper columns to utilize them, the duo aren't just one trick midgame ponies that die off as soon as you reach the late game, and transition well into the late game as options to power up your Rear Guards and completely dominate the opponent's hand throughout the late game as well.
With these units playing such an integral part of the deck's strategy however, one needs to be constantly aware of their immediate drawbacks by using them; their base power. Because of this, the deck's that much more reliant on your higher base power (and Daidragon) units, and demands that the player is able to think ahead so that the field scales properly on all fronts. With this in mind, not only are the myriad of beatsticks and Karenroid in the deck there to profit off late game rear guard gambits, but also provide a more than solid buffer to helping make sure the deck's own win condition doesn't accidentally make it fall behind and lose.
 The pint-sized elephant in the room here is Commander Laurel. With so much focus on making sure that columns stay strong, it's almost outright contradictory to include Commander Laurel in the deck. On the other hand though, the purpose it serves makes it close to invaluable to the deck, especially under the context of how the deck is normally supposed to function. More specifically, virtually all of the key cards explained up to this point, Daimagnum, Dailander, and Daidriller, all revolve around SDR Daiyusha and consistently maintaining pressure. In the off scenario that you aren't able to ride Daiyusha then, the deck quickly falls apart. Granted, one can argue that the late game strategy of beating away with Rear Guards can still work, and it could if you are really forced into it, but there's still the glaring problem that the deck's main means of functioning is still gone and the deck will fall behind because of that. With Commander Laurel, this problem is mostly avoided by granting either Daikaiser or Great Daiyusha similar pressure that makes SDR Daiyusha so potent and powerful for the deck.
 With all of the explanation behind the +4K units, it should be more than obvious what role Daiyusha plays in the deck. It is the go to ride on turn 3 and the best way for the deck to generate card advantage throughout the mid game, helping you get leverage over the opponent so that by the late game, it's becomes increasingly more difficult to possibly make a comeback as they fall farther and farther behind.
Daikaiser on the other hand isn't as integral to the main strategy, yet like Laurel, provides an amazing backup strategy to help bounce back should you lose SDR Daiyusha. Especially when allowed to combo off Great Daiyusha, a lot of ground can be immediately regained. For example, if you are at either 4 or 5 damage and the opponent is only at 3, Break Riding Great Daiyusha over Daikaiser is nearly guaranteed to trigger Great Daiyusha's Limit Break. Thanks to this, the opponent will most likely be forced to guard the Vanguard's attack unless they're willing to risk a Critical Trigger and losing. Also considering that the attack will be +25K, the opponent's hand advantage is absolutely going to crash trying to deal with the attack. Along with this raw power, Daikaiser's ability to retire Guardians only means that the opponent needs to expend that much more just to keep your attack in check. Between threatening to finish off the opponent from far behind to absolutely destroying the opponent's hand, the combo, with Laurel, gives the deck so much more to work with even without Daiyusha, rounding out its performance as a whole.
Finally, Great Daiyusha acts as the key transitional card into the late game. Defensively, 13K defense deters the opponent from too easily setting up columns that build for 10K magic numbers, and in the case they do so anyway, it forces them to have to reset their field, taking up quite a bit of effort and card advantage in the process. On the other end of the spectrum, if it was Cross or Break Ridden over Daiyusha or Daikaiser, it's otherwise guaranteed to meet its Soul Requirement for the late game. In other words, by the time the player enters the late game themselves, there should be zero debate over whether to use the +4K units on the Vanguard or on Rear Guard as Great Daiyusha does that job all on its own. Proper timing allows it to immediately takeover SDR Daiyusha's role and function unilaterally better when used properly.
Grade 0
Dimenional Robo, Daimagnum
X4 Demonic Eye Monster, Gorgon
X4 Dimensional Robo, Daibattles
X4 Dimensional Robo, Gorescue
X4 Justice Cobalt
X4 Dimensional Robo, Dailander
X4 Dimensional Robo, Daishield
X4 Dimensional Robo, Daitiger
X2 Karenroid, Daisy
Grade 2
X1 Dimensional Robo, Daibarrett
X4 Dimensional Robo, Daidragon
X4 Dimensional Robo, Daifighter
Grade 3
X4 Dark Dimensional Robo, "Яeverse" Daiyusha
X2 Super Dimensional Robo, Daiyusha
X4 Super Dimensional Robo, Daikaiser
.jpg) Reverse Daiyusha doesn't actually have an explicit need to follow through with its Grade 0s. The triggers, while valuable as triggers, don't play a valuable role to the deck any bigger than just that. Daimagnum also takes a back seat here. While his skill is valuable in the late game for better bursting down the opponent should you have the means to immediately replace him, the deck's lack of reliance on SDR Daiyusha means you don't have nearly as much need to dedicate yourself to Daimagnum.
Reverse Daiyusha doesn't actually have an explicit need to follow through with its Grade 0s. The triggers, while valuable as triggers, don't play a valuable role to the deck any bigger than just that. Daimagnum also takes a back seat here. While his skill is valuable in the late game for better bursting down the opponent should you have the means to immediately replace him, the deck's lack of reliance on SDR Daiyusha means you don't have nearly as much need to dedicate yourself to Daimagnum.Similarly, Dailander falls into this ditch. Including that you may more or less be forced into calling it during the midgame just so you don't fall behind offensively, its uses drop from sustaining SDR Daiyusha's advantage generating Critical to maybe bursting with a 3 stage column or making sure your late game beaters take over. Depite this however, while retaining the 'Dimensional Robo' name for Reverse to utilize, its ability to help get your beaters or even excess Grade 1s get strong enough to bully your opponent further during Reverse's Limit Break. Not only will it be boosting beaters, but its 6K base will no longer be a downfall in any way due to (most likely) being locked. With this in mind, it should be relatively obvious why the Grade 2 selection are mostly just beaters.
Obviously though, the key piece of the deck here is Reverse Daiyusha himself. Where standard B.a.s.s. Values function at about 228/49, or 4.7 cards forced out on average, assuming a field not unlike this:


You are looking at a B.a.s.s. Value of about 7.1 cards against, with this specific field, 11K Vanguards. Along with this, with cards like Dailander or Daimagnum, this can build even higher and force out so much more. Granted, fields are extremely situational, so I won't waste time sputtering more B.a.s.s. Values for every individual field setup, but just keep in mind of just how powerful Daiyusha alone is.
...Except, the deck can give you even more. Daikaiser plays a much larger role in the deck than that in the Great Daiyusha deck list and not only makes it possible to potentially lock out or smash straight through Perfect Guard(s), but once more ramps up Reverse Daiyusha's late game so much higher in strength.
How the decks work
What I really want to emphasize here is that these decks are not built to be as optimal as possible. These two builds are here to emphasize their respective bosses specific strengths to the fullest dramatization. What I mean here is that everything was done to make the Great Daiyusha build a powerful midgame deck whereas the Reverse Daiyusha build is designed as a late game oriented one.
 To further my point, Great Daiyusha has virtually zero costs associated with him. Sure, you can argue the Dimensional Robos in Soul requirement may amount to something, but at the same time, it's not like you're losing an arm and a leg without its Limit Break, so the important thing to focus on here is that you are not obligated in any way to reserve, in this case, Counter Blasts for the late game. What this means is that a really good Great Daiyusha build will utterly devote itself to consistently trading its CB for power in the form of the +4K boosts you can give to SDR Daiyusha, since it almost literally has nothing it has to hamstring its efforts to.
This build in particular aims for as much midgame optimization as possible. Thanks to Daimagnum acting as a buffer for Dailander and Daidriller, probability dictates that it's nearly guaranteed to constantly be whacking away at the opponent with a +1 Crit Vanguard if you were to ride into Daiyusha first. In any case where you aren't able to ride into Daiyusha first, Daikaiser's presence in the deck minimizes the worst case scenario of being forced to ride into Great Daiyusha right away, in fact bringing down the probability of having to deal with this to 8.4%, and even lower when you consider the Grade 1 and 2 rides. Even in the off scenario that you fall behind in the late game, be it some unlucky triggers or Daikaiser's lack of pressure makes you lag a bit, Great Daiyusha's late game crit in tandem with the powerful rear guard columns that the +4K units enable will give you a solid means of making a comeback. Everything about the deck is optimized to consistency, and between giving you as powerful of a midgame as possible to forgiving you in as many ways as possible if you miss it, this consistency more than does its job.
What I did to make Reverse Daiyusha's strengths so much more evident is by putting all of the deck's emphasis on the late game. This is why Daimagnum's purpose in the deck has otherwise fallen off, as the need to act as a buffer for Dailander and Daidriller isn't as evident as their place in the Great Daiyusha decklist.
 The important thing to note about the Reverse Daiyusha decklist is just how powerful its late game is. In the best case scenario with Daikaiser and the +4K units, its possible burst down as much as 10 cards if the opponent is at 5 damage. I won't go over the specifics of every single scenario, but it should be more than enough to put into perspective just how powerful Reverse Daiyusha is. The best way to utilize the decklist here is to find the right opportunities to fight your opponent, and do what you could to create those opportunities. What I mean is to think a few turns ahead and know when and where a powerful burst will be virtually guaranteed to win you the game before your own resources run out. Once again, case by case scenario, but the key here is to utilize the cards in your deck to create opportunities. Daikaiser is an extremely easy example; what with his ability to possibly outright bypass Perfect Guards and just demanding so much more out of the opponent in general. Similarly, Dailander can create opportunities for you in the midgame if you know your opponent's deck is prone to midgame pokes by helping to create stage 3 columns. In the late game, Dailander also can double up with Daimagnum to supplement your late game burst. Since you've most likely been saving Daimagnum since most of the time due to not needing to use it in the midgame, during the turn you burst, you can send Daimagnum to the soul to create space for Dailander to be called, offsetting the minus by having given the Vanguard more powerful. On top of having been able to trade off well, since a rear guard circle is open, you can call Dailander there and apply even more power, all this adding on to how devastating Reverse Daiyusha can be.
To end off, Reverse Daiyusha as a card is strictly superior to Great Daiyusha as a card. It has a much stronger late game, its cost isn't too taxing (albeit restraining cards like Daisy and Laurel), and if you want to have a similar performance to the one created in the Great Daiyusha decklist, all you need to do is simply be okay with not using Reverse Daiyusha (much) in the late game. What I should emphasize here though is that you aren't as entirely dedicated to the main gambit then. This should be the defining difference between these two cards, and other card comparisons. While there are some cases where numbers prevail at explaining things, such as the difference between a Cross Ride and a Break Ride's card advantage, not everything can be seen as strictly linear and to be compared directly, as things like being able to devote the entire deck as a whole to a midgame gambit (Great Daiyusha, in this case) to setting up for late game domination (Reverse Daiyusha) take such different routes that trying to compare them directly is simply going to lead to misunderstandings. Instead, let this be a lesson to show how qualitative attributes can make all the difference.
Friday, March 14, 2014
Another Update
To start off, I swear, I've been working. Great Daiyusha vs. Reverse Daiyusha is like 3 requests in one though so it literally takes (over) 3 times as long to write. Sorry if I seemed dead, just letting my OCD slow this painfully long process to a crawl.
Once that's out of the way though, the new beginner videos I said I would start in the last update need a skeleton. I can come up with a few topics on my own but really, it would make the process a lot easier if I can get ideas from others.
Finally, if you want to see me working on a much more consistent basis, check this thread out. The basis of it is it's a request thread for math specific aspects of Vanguard for the Vanguard mathematicians (which mostly just consists of me and Timmy Power Gainer on Pojo) to calculate and answer. Since probability is MUCH easier for me to do in a single session, if you have any math related questions, I suggest you channel them here.
Friday, February 28, 2014
Card Review:Sunlight Goddess, Yatagarasu
.jpg)
[AUTO](VC) Limit Break 4 (This ability is active if you have four or more damage):[Soul Blast(9)] When this unit attacks a vanguard, you may pay the cost. If you do, draw two cards, and choose up to two of your «Genesis» rear-guards, and [Stand] them.
[AUTO](VC): During a battle that this unit is attacked, when your «Genesis» guardian is put into the drop zone, put that card into your soul. This ability cannot be used for the rest of that battle. (If two cards or more are put into the drop zone at the same time, you may only put one of them into the soul)
This card is so outrageously simple.
How to use this card
.jpg) Wisdom Keeper, Metis is probably Yatagarasu's best friend. Assuming you break ride into this card about around turn 5, the cards you've ridden make up 3 Soul, and Metis' Soul Charge should amount to 5. Count 3 more thanks to Metis' skill, and you're looking at maybe only 1 card you need to Soul Charge outside of what you're already doing. Finally, since almost all Genesis Starting Vanguards generally add at least 1 Soul, the reality is that with Metis, you have almost nothing to worry about, at least in terms of being prepared to use the Limit Break. The only problem with this picture is that Metis essentially is carrying Yatagarasu through mostly just its own efforts, so it kind of seriously sucks without Metis then. Assuming you aren't an idiot that doesn't know how to guard early and competently, you're still looking at 4 Soul to begin with before you get to the late game, thanks to Yatagarasu's secondary skill. After that, the starters are largely going to influence how the card plays. These next analyses all assume you ride immediately into Yatagarasu, and your deck contains some combination of these four cards.
Wisdom Keeper, Metis is probably Yatagarasu's best friend. Assuming you break ride into this card about around turn 5, the cards you've ridden make up 3 Soul, and Metis' Soul Charge should amount to 5. Count 3 more thanks to Metis' skill, and you're looking at maybe only 1 card you need to Soul Charge outside of what you're already doing. Finally, since almost all Genesis Starting Vanguards generally add at least 1 Soul, the reality is that with Metis, you have almost nothing to worry about, at least in terms of being prepared to use the Limit Break. The only problem with this picture is that Metis essentially is carrying Yatagarasu through mostly just its own efforts, so it kind of seriously sucks without Metis then. Assuming you aren't an idiot that doesn't know how to guard early and competently, you're still looking at 4 Soul to begin with before you get to the late game, thanks to Yatagarasu's secondary skill. After that, the starters are largely going to influence how the card plays. These next analyses all assume you ride immediately into Yatagarasu, and your deck contains some combination of these four cards.Aiming for the Stars, Artemis - Personally, I don't recommend any ride chain where it's not necessarily needed because it introduces a lot of probability where it doesn't have to be. With that in mind however, this probability also includes collecting as much as 7 Soul by turn 3, which considering Yatagarasu's secondary skill, nearly completely does all of the Soul building necessary for the Limit Break to activate.
.jpg) Realistically speaking however, there are a lot of numbers to take into consideration. There's a 49.8% chance to ride both the Grade 1 and Grade 2, a 26.5% to just ride the Grade 2, a 4.2% chance to only ride the Grade 1, and a 17.8% chance to miss them both entirely. In other words, the possibility to start turn 3 with 7-8 soul 1/2 the time, 4 soul 1/4 of the time, and 3-2 the rest. In the case of 7-8 soul, it's mostly self explanatory as to how that turns out. Getting 4 Soul however is different. Metis alone should be more than enough to get 9 Soul without outside help, but in the case of missing Metis, making up 5 Soul will be a bit of a challenge. Yatagarasu's skill should generally be enough to carry you to about 6 Soul in total by the late game, but ultimately, Tatsutahime is your most reliable means of getting you up to 9 soul. Sahohime could potentially do the job, but pressure doesn't exactly favor Rear Guards and Rear Guards alone. If caught at 3, Cumin should be more than enough to help here. However, being caught all the way at 2 Soul is going to be far harder to make up for, as your most reliable means of generating that 5 Soul, Tatsutahime, runs into Counter Blast issues as the late game locks out the Vanguard lane's means of pressure, and almost completely shutting down Sahohime. You should only need 1 extra Soul if you're able to use Metis in this situation, but in the worst of worst case scenarios, or similar scenarios such as the opponent having the gall to guard Artemis and locking you out of a lot of necessary soul, you're going to run into a number of problems trying to get around this.
Realistically speaking however, there are a lot of numbers to take into consideration. There's a 49.8% chance to ride both the Grade 1 and Grade 2, a 26.5% to just ride the Grade 2, a 4.2% chance to only ride the Grade 1, and a 17.8% chance to miss them both entirely. In other words, the possibility to start turn 3 with 7-8 soul 1/2 the time, 4 soul 1/4 of the time, and 3-2 the rest. In the case of 7-8 soul, it's mostly self explanatory as to how that turns out. Getting 4 Soul however is different. Metis alone should be more than enough to get 9 Soul without outside help, but in the case of missing Metis, making up 5 Soul will be a bit of a challenge. Yatagarasu's skill should generally be enough to carry you to about 6 Soul in total by the late game, but ultimately, Tatsutahime is your most reliable means of getting you up to 9 soul. Sahohime could potentially do the job, but pressure doesn't exactly favor Rear Guards and Rear Guards alone. If caught at 3, Cumin should be more than enough to help here. However, being caught all the way at 2 Soul is going to be far harder to make up for, as your most reliable means of generating that 5 Soul, Tatsutahime, runs into Counter Blast issues as the late game locks out the Vanguard lane's means of pressure, and almost completely shutting down Sahohime. You should only need 1 extra Soul if you're able to use Metis in this situation, but in the worst of worst case scenarios, or similar scenarios such as the opponent having the gall to guard Artemis and locking you out of a lot of necessary soul, you're going to run into a number of problems trying to get around this.Fun thing to note though, the ride chain if fully successful will load you up with 7-8 soul by turn 3. Ride Metis, and Break Ride, and you're looking at about 13-14 soul by the late game. Maybe through Break Riding twice or getting especially lucky with your Soul Charging support, and it may open up the opportunity to use Yatagarasu twice. Granted, you've got to jump through a lot of hoops, and you're going to end up with a lot of excess soul if you aren't able to utilize this fully, but if you are willing to risk the numbers and use Artemis in the first place, it's just something to consider.
 Battle Maiden Amenohoakari - One of the seemingly more reliable starters, it should easily be able to get you to 9 Soul with Metis meaning you have very little to worry about when it comes to including more Soul support to help supplement your plays. The only problem with this particular starter is that it more or less may class with Tatsutahime, as both of their most optimal spots are behind the Vanguard, easily leading to have to pick one or the other. This causes a slight hiccup when playing without Metis, as with Amenohoakari and Yatagarasu, you're only looking at about 6 Soul by turn 5. If the game manages to last longer than this, Soul shouldn't be a problem, but because resources are finite, this isn't a reliable strategy to fall back on. Unfortunately, without Tatsutahime, you would need to work quite a bit harder to make up that 3 Soul, and even with Sahohime at 4 and its capabilities should you ride it, off scenarios such as missing it on the ride up or the opponent guarding can lead to problems. While Yatagarasu is still a viable option should you be able to get your Soul somehow, I would highly suggest that if Amenohoakari is being used that you either dedicate the build entirely between Metis and Yatagarasu, or back off and allow use cheaper and more flexible back up Vanguards to allow you more options if things start to go south.
 Battle Maiden Tamayorihime - Once again, Tatstahime gets shafted.
Once again, there's not much particularly special happening when this card works with Metis past the near guaranteed setup. On the other hand, without Metis, that's about 7 Soul in total. It's also far less dependent on staying on the field for every turn after having ridden the Grade 3, and can activate as early as turn 2 should you have access to the Counter Blasts, ultimately making the card far more flexible than Amenohoakari in terms of getting it off the field to try to do other things. Unfortunately, the Counter Blast cost to activate its skill sort of disallows Tatsutahime to do much at all, unlike Amenohoakari which would only require it to be in the Rear Guard and at least has the potential of more easily allowing double Rear Guard columns. More to the point, this means that Existence Angel will have to take up the role of topping off that last bit of Soul, or Cumin would need to combo off something else in order to make it. In the end, a more focused build specifically on Yatagarasu and Metis is just a little more feasible with Tamayorihime.
.jpg) Witch of Prohibited Books, Cinnamon - Similar to Tamayorihime in that it will generally give you 7 Soul by turn 5 or so, it has one major advantage over the other starter; Counter Blasts. Without needing to hamstring Tatsutahime by taking up its resources, you once again have access to one of the more reliable means of generating Soul. In fact, in the off occasion that even if you guarded properly you are still taking more damage than you can deal with, this actually means almost reliably being able to set off Yatagarasu's Limit Break by as early as turn 4.
Witch of Prohibited Books, Cinnamon - Similar to Tamayorihime in that it will generally give you 7 Soul by turn 5 or so, it has one major advantage over the other starter; Counter Blasts. Without needing to hamstring Tatsutahime by taking up its resources, you once again have access to one of the more reliable means of generating Soul. In fact, in the off occasion that even if you guarded properly you are still taking more damage than you can deal with, this actually means almost reliably being able to set off Yatagarasu's Limit Break by as early as turn 4.Unfortunately, this card faces one glitch that the others don't need to deal with; card advantage. While the reality is that only one card is lost, it's the Vanguard booster that needs to be replaced, which leads to a few glitches. On one hand, if you have a Grade 1 in hand and only one Grade 1 in hand, and you decide to use Cinnamon's skill right then and there, chances are you aren't using your cards as proficiently as possible; doubly so if you have no other boosters yet, as you lose out on quite a bit of advantage granted by triggers, which is something you need to deal with. On the other hand, if you don't have a Grade 1 in hand and you go ahead and use Cinnamon, in the off chance that you don't draw another Grade 1 or such, you will be missing your Vanguard booster, which is a huge loss considering how important a full powered Vanguard attack is for your forward leverage, and is now something you really have to deal with. All in all however, you're trading some proficiency in the card's actual usage for far more freedom with CB and more flexible deck choices, so if you can play around these quirks, Cinnamon can definitely do her job.
With all of that out of the way, Yatagarasu herself is extremely simple to use assuming you aren't an idiot, so going in depth about her will be extremely redundant. Along with this, I only used Metis as an example as she gives the easiest access to Yatagarasu's Limit Break without much hassle at all, but you can opt to use a different Break Ride if you think the rest of your deck's Soul support can keep up. In the end however, what really makes Yatagarasu complicated and warrants the most attention out of the player is the deck composition and being able to properly capitalize off the starter, as smart decisions will pay off in the end.
How to Fight Against This Card
 While the opponent is using, say, Metis, it will be damn near impossible to avoid having to deal with the Limit Break should the opponent draw into Yatagarasu. Because of this, there isn't exactly a point of prioritizing anything else than to deal with the late game mess Yatagarasu is going to cause. With this in mind, there's really only one goal when trying to fight against the deck; don't get caught up in the Limit Break. Luckily, there are some quirks about the deck that should help you outmaneuver Yatagarasu, most of these riding on how the deck as a whole is/must be designed. Depending on how dedicated the deck is to picking up Yatagarasu without Metis, you could easily see a virtually vanilla deck coming up to face you. With so much of their deck designed around catering to Yatagarasu's soul, and said soul already being fulfilled by Metis, it means that all their Soul Support units (and thus, pressure units) are rendered virtually useless; this goes for before and after Yatagarasu's Limit Break, generally. What this basically means is that there is only one thing from the deck you need to worry about, Yatagarasu's Limit Break. Take every early game and mid game advantage you can take, whether it be through early guarding, scaling your field to odd stages, and taking full advantage of whatever skills that you have access to that early in the game. Since Yatagarasu's Limit Break is otherwise inevitable, your goal is to create as much distance as possible between you and the opponent so that even after Yatagarasu Limit Breaks, you will be able to pull through. At that point, their deck will once again be rendered virtually unable to do anything other than very basic moves, which almost every deck in the game - should you have played properly up to this point- will be able to outplay and generally beat.
With all of that out of the way, there are the scenarios that Metis won't be carrying the deck. Because of the large amount of clues there should be as to whether or not the opponent is running a backup Vanguard, along with the fact the opponent probably will ride it turn 3 anyway, let's focus more on when Yatagarasu has to focus on Soul Building support to get to its Limit Break. With this in mind, the most obvious cue to take note of is how much pressure plays a role behind any possible advantage generated. In other words, if your deck has the defensive/hand advantage capabilities to constantly defend from a pressure vanguard, a similar concept will be able to counteract Yatagarasu's main forms of generating Soul. While I can't provide examples due to every scenario being otherwise extremely specific and situational, knowing your own deck's capabilities and whether or not expending mid game resources for the late game or vice versa will best fit your deck will be the key here.
Saturday, February 22, 2014
I'm Back Again, So Here Are Some Important Announcements
How the heck am I still getting such a decent flow of traffic...
Since it turns out the majority of people who come to this blog came here through Google, Vampirestat, and Google Philippines, and apparently Google Singapore happening to like my blog a lot, I'm going to assume most of you don't check the Pojo blog thread that hosts links to all sorts of CFV blogs of all kinds. So for those of you who don't know, I've been dealing with a whoooole lot with school and family and yada yada you've all heard this story before so I won't depress you. I think I mentioned getting over this weeks earlier but then I got mildly depressed, and then school caught up, and then stress. Yeah...point is, school is on break and I've had time to sort things out so all my stress from school is mostly gone and all family and in general life issues have been worked out and I finally feel motivated enough and have the time to get back to work on big, actual articles the blog. Hurray.
So, a few announcements to be made. Once again, judging from how the majority of you are coming to my blog, you probably aren't aware of my most recent project; the Errata'd Format. I've hinted to this time and time before, I think, but I'm finally going public with it. In short, a few friends and I aren't exactly...happy, about the power creep that the game's been facing lately, at all. Like, to make my point clear, pit a BT05 Murakumo deck against a well updated Chaos Breaker Dragon deck for a few matches (hopefully between equally skilled players). Not a fun time for Murakumo. So, we created a(n older version of the current) grading scale to balance all the cards in the game (at the time), and it actually turned out pretty great. We no longer BS'd each other about how "this deck is so broken dude, I just want to have a fun match, don't play that deck" since virtually every deck we played with were balanced and generally were able to compete with each other. Quite a few bugs getting worked out and updates to the grading scale later, and I have the newest updated list for the Errata'd Format up to Season 2, at the time of posting. I'd like others to at least try this out for themselves; see if the game looks far more balanced with the Errata'd format. Our goal now with this is to make the game as fair and balanced for all decks as possible, and since I'm done with most of all the raw number work, I'd really like to get more responses from other players to see what everyone else thinks about the format and if something could be fixed. I need to stress however that while the current list can more than do the job, the Errata'd Format is still a work in progress, and I feel that there are things that can still be improved. So, if you're an intellectual person and think you can keep up with my work, or if you just tried out a few games using the Errata'd Format with your friends and noticed a glitch that needs to be fixed or an improvement that can be made, please email me, comment below, or contact me through Pojo, as I'd enjoy any and all advice to help fix out the Errata'd Format.
With that out of the way, I mentioned the Pojo thread with all the blogs. First of all, I recommend that if you haven't seen any of the active blogs, check them out. Some of them provide great reads and others...don't, and I'm sure you can find other bloggers that may interest you. Second, I want to expand the blog list a bit more. If you happen to know any bloggers that aren't associated with Pojo, please either ask them to message me or send me a link to their blog so I can go ask them. The tl;dr to this is that I really would like to improve communication and the sharing of ideas among the Cardfight Vanguard communities, and I'd like to start by connecting blogs so that it becomes much easier for everyone's voice to be heard. With that in mind, I highly suggest you also keep the Pojo thread bookmarked for any recent updates.
Finally, apparently my voice isn't causing people's ears to bleed, so I'm going to be starting a beginner series for the little tips and tricks that newbies can pick up to get better at the game. I already have a basic outline for topics I want to touch up on but I would greatly appreciate it if you can suggest any subjects in particular that you think would help out newbies either here or in the request box.
Hopefully, I won't be gone for another month again.
Finally, apparently my voice isn't causing people's ears to bleed, so I'm going to be starting a beginner series for the little tips and tricks that newbies can pick up to get better at the game. I already have a basic outline for topics I want to touch up on but I would greatly appreciate it if you can suggest any subjects in particular that you think would help out newbies either here or in the request box.
Hopefully, I won't be gone for another month again.
Monday, January 13, 2014
Youtube Again
Listen to this.
In short, if it was bad, tell me so. I'll never make a video again. If it was passable, I might start making video commentaries.
Friday, January 3, 2014
Card Review:Demonic Conquering Dragon, Dungaree "Unlimited"
Oh dear god, I forgot to press 'publish' before I took a break for Christmas/New Years

[AUTO](VC) Limit Break 4 (This ability is active if you have four or more damage):[Counter Blast (2) & Bind the top card of your deck face up] When this unit attacks a vanguard, you may pay the cost. If you do, choose up to one of your opponent's rear-guards in the front row, retire it, and this unit gets [Power]+2000 for each «Narukami» in your bind zone until end of turn.
[CONT](VC):If you have a card named "Sealed Demon Dragon, Dungaree" in your soul, this unit gets [Power]+2000.
Well it's a Cross-Ride, so automatically it has that advantage over every other boss that isn't in existence.
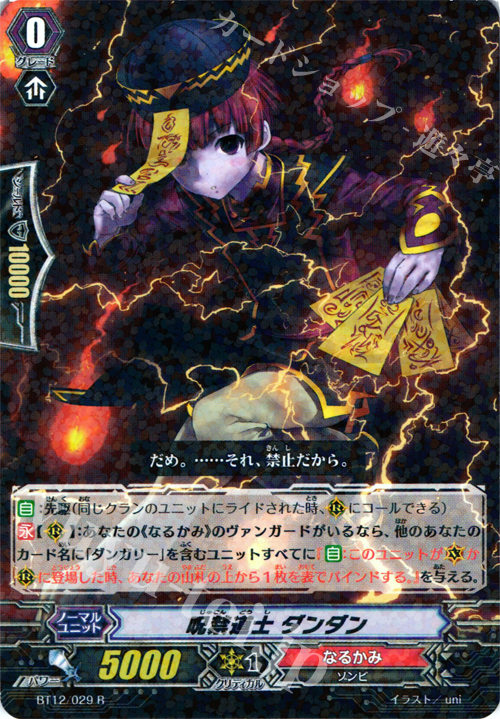 Quite frankly, there isn't much to say about this card since its skill is relatively simple in game theory and in actual execution. I should note however, that if you focus too heavily on the retiring aspect of the card in and of itself, you're probably doing it wrong. See, think of it like this. Retiring's best shtick is that it shuts down power lines, often having a permanent impact on the game. In short, one should always target stage 3 columns; those that force out 15K to guard. The problem is, Dungaree Unlimited is usually going to be sitting on 13K defense, which isn't exactly easy to set up upon. In fact, it usually takes very dedicated builds to be able to generate +23K Rear Guard lanes, and even among them, only a few can do it consistently and/or being able to reuse said lines easily. In short, Cross Riding ultimately makes the retiring aspect of Dungaree Unlimited's skill redundant. The argument can barely even be made that there are the occasions that you don't Cross Ride that you'd have to worry about, as in a deck with no means of manipulating riding consistency, the ability to Cross Ride will happen about 60% of all matches, and 75% of all matches that you rode up properly in the first place. Now, don't somehow misinterpret this as 'Dungaree Unlimited is bad' or 'Retiring with Cross Rides being redundant is the end of the world' or something silly like that. Rather, it simply means that Dungaree Unlimited's role here is not defensive, and should not be perceived as so.
 It should be interesting to note just how easy powerful attacks can be achieved through Exorcist Mage, Dan Dan and the easy to use 10K boosters that Narukami has access to. Just by riding Unlimited, one use of Unlimited's skill grants it +4K power, which with a 10K booster leads to a 25K Vanguard column; 4 to 5 stages onto nearly every other Vanguard in the game. The moment that the original Dungaree gets involved however, what with supplying 3 more Binds and Cross Ride defense, Dungaree Unlimited is easily looking at a 33K attack; 6 stages against every other Vanguard in the game and requiring a minimum of at least 3 cards to defend against without Perfect Guards, or even only aiming for a 1 to pass. Considering that some more Binds may occur through calling Rear Guards, and Dungaree Unlimited easily sizes up as one of the bigger offensive forces in the game.
How to use this card
With how much emphasis I put on pointing out the potential power that Unlimited has, it should be obvious where I'm going to go with outlining Unlimited's role in the deck: An offensive finisher, meant to overrun the opponent through gigantic numbers. What really makes Dungaree Unlimited interesting is that it's not just a one trick pony, not counting the retire that comes with its Limit Break, and all this rests with how it interacts with its previous form.
 It should be noted that Cross Riding right away is still in all around good move, regardless of these upcoming strategies. In fact, it's the exact same reasons that Cross Riding right away should be advantageous that fuel the strength behind these strategies, so if your opponent's forces are dwindling in any way, or if they're set up for 11K Magic Numbers, don't try to overthink it and go ahead with Cross Riding if it simply seems to be the best route to go with, as it's most likely going to be one way or another.
As for the strategies themselves, it all lies in how efficient Sealed Demon Dragon, Dungaree's skill is while playing off of Dan Dan. Since I assume we know to run 4 Perfect Guards or at least why one should, it should be easy to expect the opponent to have one in hand. Ignoring that you may use other units' skills in the fight, or Heal Triggers or Damage Unflippers, you're generally only going to see 2 shots at Unlimited's skill. With one Perfect Guard close to guaranteed and a second easily looming over, there's always the issue of finding ways around it. While strategies like Raptor Colonel's exist and are easily applicable here, SDD Dungaree provides an interesting spin onto standard finisher tactics. For example, if the opponent preemptively prepares for Unlimited by setting up for 18K numbers, it would ultimately make very little difference between going ahead to Cross Ride or staying behind on SDD Dungaree, at least defensively. Because of this, it's actually a perfectly valid move to stay on its previous form to wait it all out.
 Now, think of it like this. If I attacked with Dungaree Unlimited and used its Limit Break, and if the opponent only defends with a Perfect Guard, I'd be paying 2 Counter Blasts just to retire a Rear Guard, and most likely locking myself off to only one more use of Unlimited's Limit Break. On the other hand, I could save Dungaree's Limit Break and see if the opponent decides whether or not to drop their Perfect Guard then and there, and I still have two shots at Unlimited's Limit Break. Now on the other hand, if I used SDD Dungaree's Limit Break, I'd only spend 1 CB to retire a unit. Along with this, the opponent is forced into that position of deciding to use their Perfect Guard or not. Finally, if I (eventually) get to 5 damage, I'd still have 2 more shots at Dungaree Unlimited's own Limit Break.
That was just one example, where I would manage to attain every benefit from both outcomes of using Dungaree Unlimited simply by using SDD Dungaree. In another case, you could have used a card like Dragonic Deathscythe, which would cost you 2 Counter Blasts. Once again assuming you (eventually) will get 5 damage, that means that you can still use SDD Dungaree and Unlimited both once.
The only problem with this strategy is that it relies on using Dungaree Unlimited's 13K base status as a cushion for SDD Dungaree to not be especially beaten up. Once again, I really must point out that this is an added feature to what you should already be drilling, and along with constantly keeping track of B.a.s.s. Values on either side of the field, you absolutely must be able to recognize when staying on SDD Dungaree will become more of a drawback than it's worth.
How to Fight Against This Card
It shouldn't be hard to recognize that you generally want to have a well balanced deck that can handle having units retired from time to time, but since that's normally an inherent trait of any good deck, there really shouldn't be much need to go into detail.
With that out of the way, what should be important to note is how to use your Perfect Guards. Unfortunately, this is an extremely case by case scenario sort of thing to deal with, meaning I can't give any proper tips. What should always be kept in mind however is to understand B.a.s.s. Values or something of the like in order to consistently stay aware of when either player will lose, and then play around it. Ultimately, the reason why the alternate strategy with SDD Dungaree works is because the Dungaree player can take control of how long the match lasts. It's being able to recognize the length of the match under this influence that can outline exactly when a Perfect Guard would be most effective, and allow for avoiding and outmaneuvering some +30K attack.
____________________________________________________________
Card Design
As usual, this thing. I'm also going to make no comments on the Cross Ride part, due to reasons...
Funny enough, the Limit is actually perfectly balanced; at least within a vacuum. 2 Counter-Blasts easily stacks up for the high quality +1 the retire generates, leaving Limit Break to count for the power boost. Ultimately, due to only one Bind in a vacuum, and the efforts of chaining multiple other cards otherwise, this means that every part of the skill is perfectly accounted for.
As per the request for the article: Unfortunately, the metagame isn't based off what is balanced and fair. Decks like Dauntless the End and Eradicators are teaming with units that functionally serve just as well as Dungaree Unlimited and SDD Dungaree can offer, while also being far cheaper and just far more easy to activate and utilize than the latter. From a Card Design perspective, the card just isn't well fitted for dealing with the metagame. While it does have the potential to do so, other cards in the game need a far more mellow and balanced out approach in their designs before such units like Unlimited, which are powerful and balanced, can really shine.
Subscribe to:
Posts (Atom)